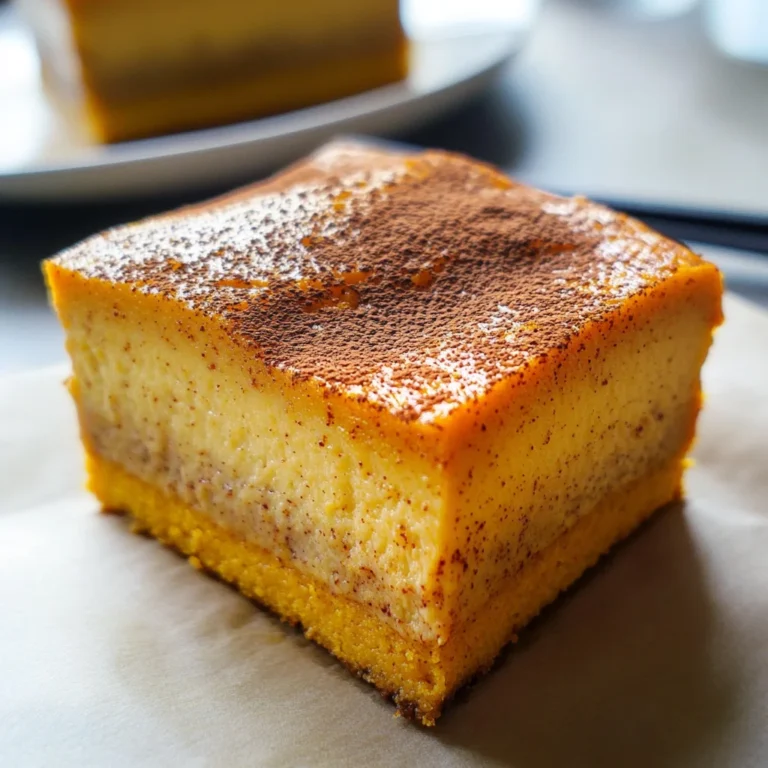
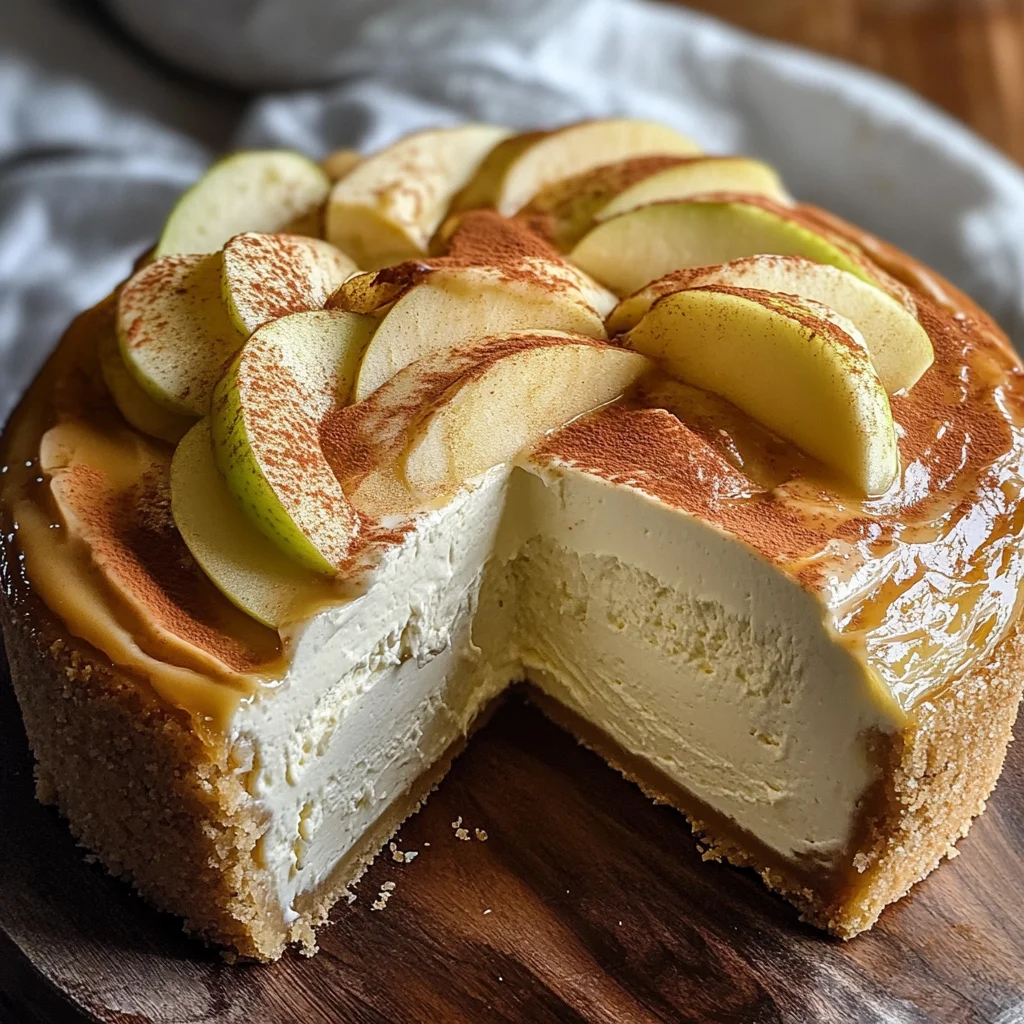
Apple Cider Cheesecake
If you’re looking for a dessert that captures the essence of autumn, then this Apple Cider Cheesecake is just what you need! With its creamy texture and the delightful tang from fresh apple cider, it’s a dish that fills your home with warmth and nostalgia. This cheesecake is perfect for family gatherings, cozy dinners, or even a special treat after a long day. Every bite is like a hug in dessert form!
This recipe has become one of my absolute favorites because it brings together simple ingredients to create something truly special. Plus, who doesn’t love the combination of creamy cheesecake and the sweet-tart flavor of apples? It’s hard to resist!
Why You’ll Love This Recipe
- Easy Preparation: With straightforward steps, you’ll be whipping up this cheesecake in no time!
- Family-Friendly Appeal: Everyone from kids to adults will adore this delicious dessert.
- Make-Ahead Convenience: Perfect for busy days; it chills beautifully overnight!
- Unique Flavor: The reduced apple cider adds a unique twist that sets this cheesecake apart from the rest.
Ingredients You’ll Need
Gathering the ingredients for this Apple Cider Cheesecake is half the fun! These are wholesome and easily accessible items that come together beautifully. Let’s take a look at what you’ll need:
For the Crust
- 2 cups digestive cookies or graham crackers (270g)
- ½ cup butter (melted) (113g)
- 1/4 teaspoon salt
- 2 tablespoons powdered sugar
For the Filling
- 3 cups fresh apple cider (honeycrisp cider is more tart!)
- Mulling spices
- 3 cream cheese bricks (227g each, softened and at room temperature)
- 1 cup brown sugar (220g)
- ½ teaspoon salt
- 2 teaspoons pure vanilla extract
- 1 cup sour cream (240g)
- 1/3 cup reduced apple cider (from above)
- 1 teaspoon cinnamon
- 3 large eggs
- 2 tablespoons all-purpose flour
Variations
This recipe is wonderfully flexible, allowing you to make it your own! Here are some fun variations to consider:
- Change Up the Spices: Feel free to experiment with different mulling spices or add a pinch of nutmeg for extra warmth.
- Add Toppings: Consider drizzling caramel sauce or adding chopped nuts on top before serving for added texture.
- Switch the Crust: Try using crushed almonds or oats instead of digestive cookies for a gluten-free option.
- Mix in Fruit: Fold in some finely chopped apples into the filling for an extra burst of fruity goodness.
How to Make Apple Cider Cheesecake
Step 1: Reduce the Cider
Start by boiling the fresh apple cider with mulling spices in a large pot over high heat. You want it to reduce down to about 1/3 cup—it should have that syrupy consistency that concentrates all those lovely flavors. This step is crucial as it intensifies the apple taste, making your cheesecake sing with autumnal notes!
Step 2: Preheat Your Oven
While your cider cools, preheat your oven to 350°F. Preheating helps achieve an even bake for your cheesecake crust.
Step 3: Make the Crust
In your food processor, pulse together the digestive cookies until they are finely ground. Add melted butter, salt, and powdered sugar. Pulse until everything sticks together like wet crumbs. Press this mixture firmly into either an 8” round springform pan wrapped with foil or into a greased cake pan lined with parchment paper. Bake it for about 10 minutes; this creates a sturdy base.
Step 4: Beat the Filling
With your crust cooling, lower the oven temperature to 325°F. In a stand mixer fitted with a paddle attachment, beat together cream cheese and brown sugar until it’s completely lump-free—this can take some time but is well worth it! Scrape down the sides as needed.
Step 5: Combine Ingredients
Add in sour cream, vanilla extract, salt, cinnamon, and reduced apple cider to your cream cheese mixture. Mix again until smooth and creamy; this ensures every bite has that rich flavor.
Step 6: Add Eggs & Flour
Now it’s time to gently fold in three eggs and two tablespoons of flour into your mixture. Be careful not to overmix—just combine until everything is smooth. Overmixing can lead to cracks in your cheesecake later!
Step 7: Prepare for Baking
Place your cheesecake pan inside a larger 13×9” baking dish filled with hot water—this creates steam during baking which helps keep your cheesecake moist.
Step 8: Bake
Pour your filling into the prepared crust and bake for approximately 90 minutes. You want it set at the edges but still wobbly in the center; this means you’ve got that perfect creamy texture waiting for you!
Step 9: Cool Gradually
After baking, turn off the oven but leave your cheesecake inside with the door slightly ajar using a wooden spoon. Let it cool gradually for about 30 minutes—this helps prevent cracking.
Step 10: Chill Before Serving
Once cooled slightly on the counter, transfer your cheesecake to cool completely before placing it in the fridge for at least eight hours. This chilling process allows all those flavors to meld beautifully.
And there you have it—a delightful Apple Cider Cheesecake that’s sure to impress! Enjoy sharing this tasty treat with friends and family!
Pro Tips for Making Apple Cider Cheesecake
Making a cheesecake can be a delightful experience, and with these tips, you’ll ensure your Apple Cider Cheesecake turns out perfectly every time!
-
Use room temperature ingredients: This helps the cream cheese blend smoothly, resulting in a creamy texture without lumps. Cold ingredients can create a grainy consistency.
-
Don’t overmix after adding eggs: Overmixing can introduce too much air into the batter, leading to cracks during baking. Mix just until combined to keep your cheesecake smooth.
-
Bake in a water bath: This technique helps maintain an even temperature throughout the cheesecake, preventing the edges from cooking faster than the center and reducing the risk of cracks.
-
Cool gradually: Allowing your cheesecake to cool slowly in the oven helps prevent sudden temperature changes that can cause cracking. It also enhances its richness and flavor.
-
Plan ahead: Make your cheesecake a day in advance! It benefits from chilling overnight, allowing the flavors to meld beautifully and making it easier to slice.
How to Serve Apple Cider Cheesecake
Serving your Apple Cider Cheesecake is an exciting part of the experience! Impress your guests with thoughtful presentation and delicious accompaniments that complement its rich flavors.
Garnishes
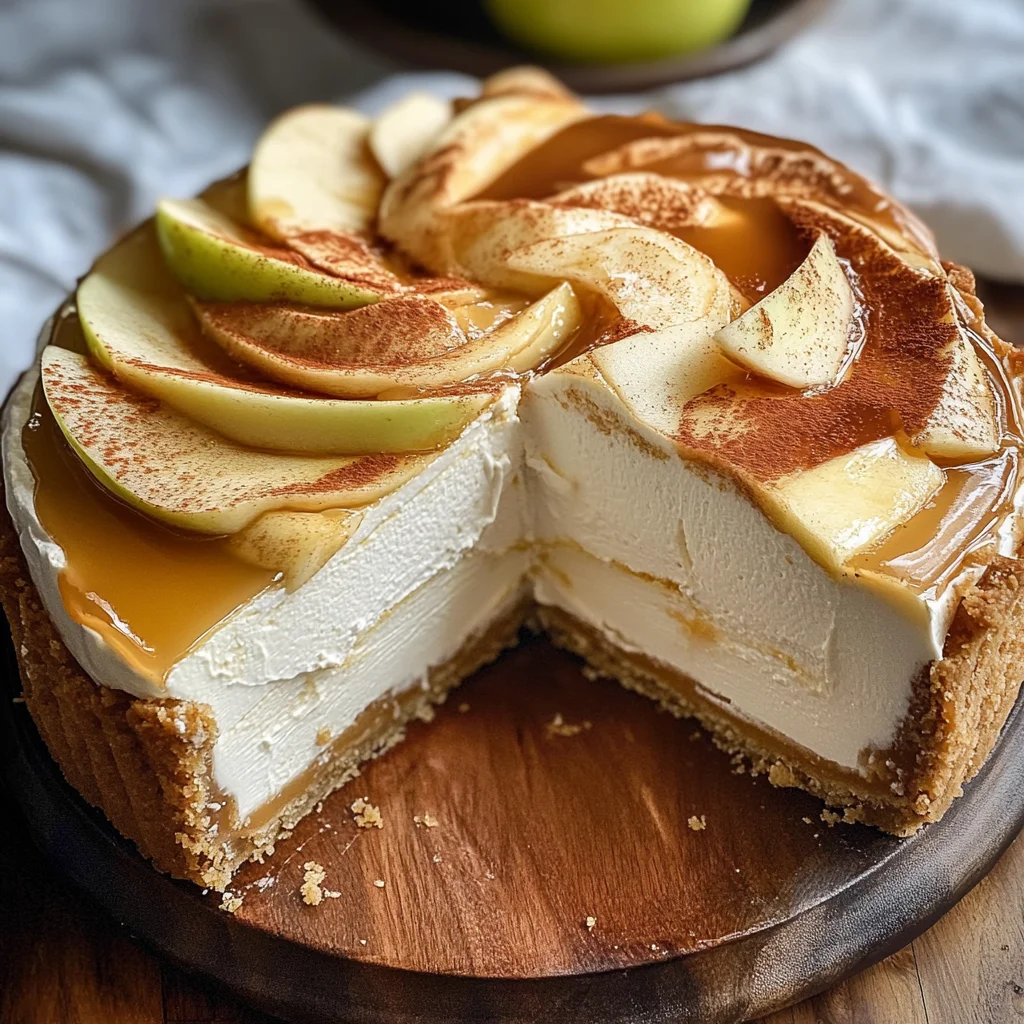
- Fresh whipped cream: A dollop of freshly whipped cream adds lightness and creaminess that balances the dense cheesecake.
- Caramel drizzle: A drizzle of caramel sauce provides a sweet contrast that enhances the apple flavor while adding visual appeal.
- Sliced apples: Thinly sliced, fresh apples not only add color but also bring a refreshing crunch that pairs wonderfully with the creamy texture.
Side Dishes
- Spiced apple cider: Serve alongside a warm cup of spiced apple cider to echo the flavors of your cheesecake and create a cozy atmosphere.
- Pumpkin pie bars: These bars offer a different texture and spice profile while keeping within seasonal flavors, making them perfect for fall gatherings.
- Vanilla ice cream: A scoop of vanilla ice cream complements the richness of the cheesecake, providing a creamy contrast that melts in your mouth.
- Autumn salad: A fresh salad with mixed greens, candied nuts, and dried cranberries adds a refreshing touch that balances out dessert indulgence.
Now that you’re armed with these tips and serving suggestions, it’s time to delight yourself and others with this luscious Apple Cider Cheesecake! Enjoy every bite as you celebrate all things autumn.
Make Ahead and Storage
This Apple Cider Cheesecake is perfect for meal prep! You can make it ahead of time, ensuring you have a delicious dessert ready for any occasion. Here’s how to store and enjoy it later.
Storing Leftovers
- Store the cheesecake in an airtight container in the refrigerator.
- It will keep well for up to 5 days.
- If you have leftover slices, wrap them individually with plastic wrap before placing them in a container.
Freezing
- To freeze, ensure the cheesecake is completely cooled and set.
- Wrap it tightly in plastic wrap followed by aluminum foil to prevent freezer burn.
- It can be frozen for up to 2 months. When ready to enjoy, thaw it overnight in the refrigerator.
Reheating
- For a creamy texture, it’s best served chilled directly from the fridge.
- If you prefer it slightly warm, let it sit at room temperature for about 30 minutes before serving.
- Avoid reheating in the microwave as this can alter the texture of the cheesecake.
FAQs
Here are some frequently asked questions about making this delightful dessert.
Can I use store-bought apple cider for the Apple Cider Cheesecake?
Absolutely! Store-bought apple cider works well if you don’t have time to reduce fresh cider. Just choose a high-quality brand for the best flavor.
How do I know when my Apple Cider Cheesecake is done baking?
The cheesecake is done when the edges are set but the center remains slightly wobbly. This gentle jiggle ensures that your cheesecake will be creamy once cooled!
What if I don’t have mulling spices?
If you don’t have mulling spices on hand, you can create a simple blend using cinnamon, nutmeg, and allspice. Just combine equal parts of each spice for a lovely autumn flavor!
Can I make this Apple Cider Cheesecake gluten-free?
Yes! Substitute regular digestive cookies or graham crackers with gluten-free alternatives. Just ensure that all other ingredients are also gluten-free.
Final Thoughts
I hope you find joy in making this Apple Cider Cheesecake! With its rich flavors and creamy texture, it’s truly special and perfect for gatherings or cozy nights at home. Enjoy every bite and feel free to share your experience with me. Happy baking!
Apple Cider Cheesecake
Indulge in the rich and creamy delight of this Apple Cider Cheesecake, a perfect dessert to celebrate the essence of autumn. The unique combination of fresh apple cider and mulling spices creates a flavor profile that is both comforting and sophisticated. This cheesecake not only brings warmth to family gatherings but also serves as a delightful treat for any occasion. With its velvety texture and sweet-tart apple notes, each slice is like a hug on your plate. Easy to prepare and even easier to enjoy, this dessert is bound to become a fall favorite in your household.
- Prep Time: 30 minutes
- Cook Time: 90 minutes
- Total Time: 2 hours
- Yield: Serves approximately 12 slices 1x
- Category: Dessert
- Method: Baking
- Cuisine: American
Ingredients
- 2 cups digestive cookies or graham crackers
- ½ cup melted butter
- 3 cups fresh apple cider
- 3 bricks (8 oz each) cream cheese, softened
- 1 cup brown sugar
- ½ teaspoon salt
- 2 teaspoons pure vanilla extract
- 1 cup sour cream
- 1/3 cup reduced apple cider
- 1 teaspoon cinnamon
- 3 large eggs
- 2 tablespoons all-purpose flour
Instructions
- Reduce the apple cider with mulling spices in a pot over high heat until it thickens.
- Preheat the oven to 350°F and prepare the crust by mixing crushed cookies, melted butter, salt, and powdered sugar; bake for 10 minutes.
- In a mixer, beat cream cheese and brown sugar until smooth. Add sour cream, vanilla extract, salt, cinnamon, and reduced cider; mix until creamy.
- Gently fold in eggs and flour without overmixing.
- Pour the filling into the cooled crust and bake in a water bath at 325°F for about 90 minutes.
- Cool gradually in the oven before chilling overnight in the fridge.
Nutrition
- Serving Size: 1 slice (approximately 120g)
- Calories: 360
- Sugar: 25g
- Sodium: 320mg
- Fat: 24g
- Saturated Fat: 13g
- Unsaturated Fat: 9g
- Trans Fat: 0g
- Carbohydrates: 33g
- Fiber: 1g
- Protein: 6g
- Cholesterol: 85mg