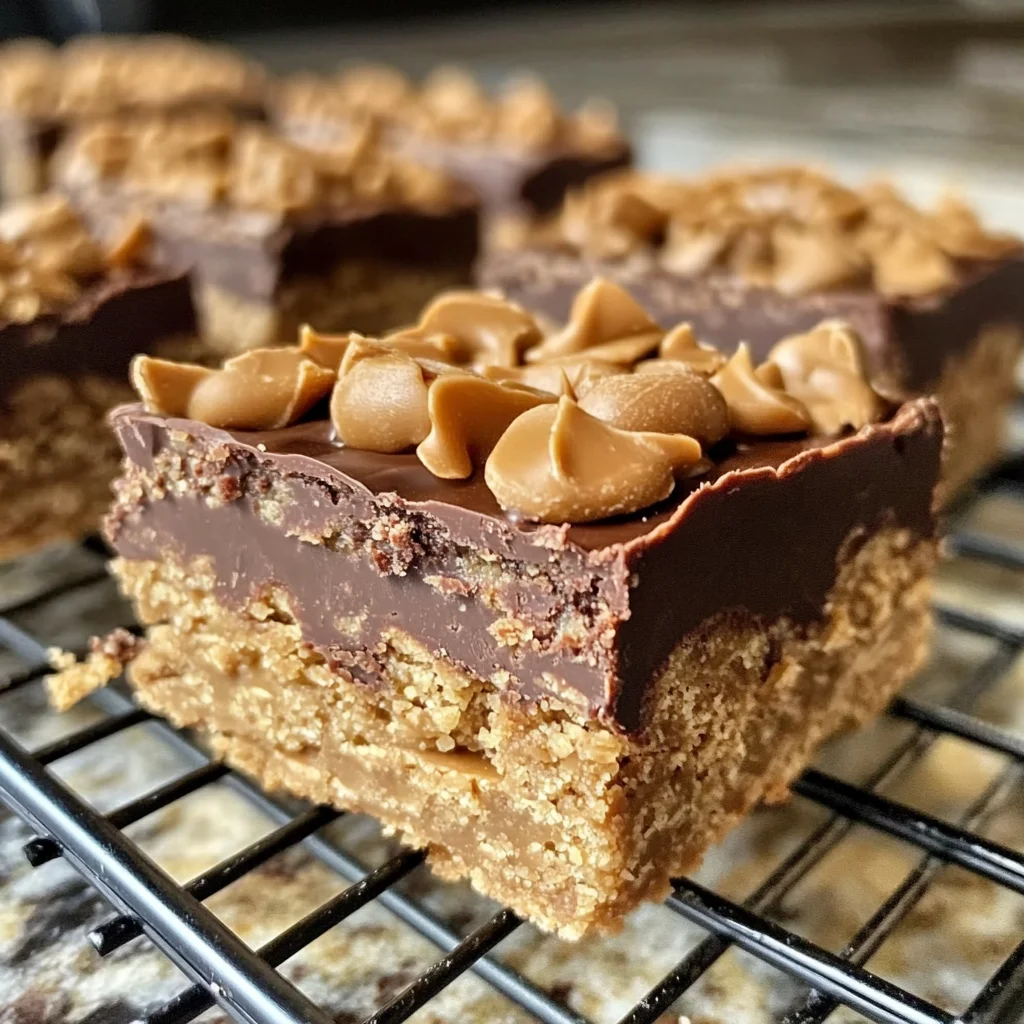
Reese’s Peanut Butter No-Bake Bars Recipe
If you’re looking for a sweet treat that combines the rich flavor of peanut butter with the delightful taste of chocolate, then you’ve come to the right place! The Reese’s Peanut Butter No-Bake Bars Recipe is one of my all-time favorites. It’s a go-to dessert that never fails to impress friends and family alike. Plus, it’s the perfect solution for busy weeknights or special gatherings when you want something delicious without spending hours in the kitchen.
What I love most about these bars is how simple they are to make. With just a few wholesome ingredients, you can whip up a batch that will have everyone asking for seconds. Whether it’s a birthday party, a family movie night, or just because, these no-bake bars are sure to bring smiles all around.
Why You’ll Love This Recipe
- No baking required: Enjoy the ease of making these bars without turning on your oven!
- Quick preparation: In just 10 minutes of prep time, you can have these treats ready to chill.
- Family-friendly: Kids and adults alike adore this creamy, chocolaty combination.
- Make-ahead convenience: Prep these bars in advance and have a sweet treat ready whenever cravings strike.
- Decadent flavor: The blend of peanut butter and chocolate delivers an irresistible taste every time.
Ingredients You’ll Need
Let’s gather some simple and wholesome ingredients for our Reese’s Peanut Butter No-Bake Bars. You probably have most of these in your pantry already!
For the Base
- 1 cup (240g) creamy peanut butter
- 1 cup (225g) unsalted butter, melted
- 2 cups (250g) powdered sugar
- 2 cups (200g) grachicken chicken ham cracker crumbs
For the Topping
- 1½ cups (260g) semisweet chocolate chips
- ½ cup (120g) creamy peanut butter
Variations
One of the best parts about this recipe is how flexible it is! Feel free to get creative with your ingredients and make it your own.
- Add some crunch: Mix in chopped nuts like peanuts or almond slivers for added texture.
- Go dark: Swap semisweet chocolate chips for dark chocolate chips for a richer taste.
- Flavor twist: Add a sprinkle of sea salt on top before chilling for a sweet-salty combo.
- Make it nut-free: Substitute sunflower seed butter for nut allergies while still keeping that deliciousness intact!
How to Make Reese’s Peanut Butter No-Bake Bars Recipe
Step 1: Prepare the Base
In a large mixing bowl, combine the melted butter, creamy peanut butter, powdered sugar, and grachicken chicken ham cracker crumbs. Stir until everything is well incorporated and smooth. This step is crucial because it sets up the rich base that holds everything together!
Step 2: Press into Dish
Press this mixture evenly into the bottom of a 9×13-inch baking dish lined with parchment paper. Using parchment paper helps with easy removal later on! Make sure you press firmly so that it forms a solid layer.
Step 3: Melt Chocolate Topping
In a microwave-safe bowl, add your semisweet chocolate chips along with half a cup of creamy peanut butter. Heat them in 30-second intervals in the microwave, stirring each time until smooth and fully melted. This melting process creates that luscious topping we all crave!
Step 4: Pour and Spread
Pour the melted chocolate mixture over your peanut butter base. Use a spatula to spread it evenly across the top. This creates that beautiful layer of chocolate goodness we love to see!
Step 5: Chill Until Firm
Refrigerate your creation for at least 2 hours or until firm. Patience is key here! Waiting allows all those wonderful flavors to meld together perfectly.
Step 6: Slice and Enjoy!
Once firm, let the bars sit at room temperature for about 5 minutes before slicing into squares or bars. This makes cutting easier and helps avoid any crumbling! Now it’s time to enjoy every delicious bite of your homemade Reese’s Peanut Butter No-Bake Bars!
Pro Tips for Making Reese’s Peanut Butter No-Bake Bars Recipe
Creating the perfect batch of Reese’s Peanut Butter No-Bake Bars is all about the details, and these tips will help you achieve delicious results every time!
-
Use room temperature ingredients: Ensuring your peanut butter and butter are at room temperature helps them blend more smoothly, resulting in a creamier texture for your bars.
-
Press firmly: When spreading the peanut butter mixture into the baking dish, press down firmly. This creates a sturdy base that holds together better once chilled.
-
Chill longer for firmer bars: While 2 hours is recommended, letting your bars chill overnight will enhance their firmness and make them easier to slice.
-
Experiment with chocolate types: Feel free to mix semi-sweet chocolate chips with dark or milk chocolate to customize the flavor profile to your liking.
-
Use high-quality ingredients: Choosing quality peanut butter and chocolate can elevate the overall taste of your bars, making them even more irresistible!
How to Serve Reese’s Peanut Butter No-Bake Bars Recipe
Serving your Reese’s Peanut Butter No-Bake Bars can be as fun as making them! Here are some ideas to help you present this delightful treat beautifully.
Garnishes
- Chopped peanuts: Sprinkle some chopped peanuts on top for added crunch and flavor, enhancing the peanut butter experience.
- Drizzle of chocolate: A light drizzle of melted chocolate over the top adds a decorative touch that also intensifies the chocolatey goodness.
Side Dishes
- Fresh fruit: Serve alongside sliced strawberries or bananas. The freshness balances out the sweetness and adds a refreshing element.
- Coffee or tea: Pairing these bars with a warm cup of coffee or herbal tea complements their richness beautifully.
- Ice cream: A scoop of vanilla or dairy-free ice cream is an indulgent side that turns this dessert into a delightful sundae experience.
- Yogurt parfait: Layering yogurt with granola and fresh fruits makes for a wholesome side that contrasts well with the sweetness of the bars.
These serving suggestions not only enhance your dessert but also create an enjoyable experience for you and your guests! Enjoy every bite of these delicious Reese’s Peanut Butter No-Bake Bars.

Make Ahead and Storage
These Reese’s Peanut Butter No-Bake Bars are perfect for meal prep! You can whip them up ahead of time and enjoy them throughout the week. Here’s how to keep them fresh:
Storing Leftovers
- Store the bars in an airtight container at room temperature for up to 3 days.
- For longer freshness, refrigerate the bars, where they will last for about a week.
- Make sure to separate layers with parchment paper if stacking to prevent sticking.
Freezing
- Cut the bars into squares before freezing for easy access.
- Wrap each square in plastic wrap and place them in a freezer-safe bag or container.
- These bars can be frozen for up to 3 months. Just thaw them overnight in the refrigerator before serving.
Reheating
- There’s no need to reheat these no-bake bars; they are best enjoyed chilled or at room temperature!
- If desired, you can briefly microwave individual squares (about 10-15 seconds) for a softer treat, but be cautious not to melt the chocolate too much.
FAQs
Here are some common questions about making Reese’s Peanut Butter No-Bake Bars:
Can I use natural peanut butter in this Reese’s Peanut Butter No-Bake Bars Recipe?
Yes! Natural peanut butter works well, but make sure it’s creamy and well-stirred for best results.
How long do the Reese’s Peanut Butter No-Bake Bars last?
When stored properly, these bars can last up to a week in the refrigerator or up to three months in the freezer.
Can I replace graham cracker crumbs in this recipe?
Absolutely! You can use crushed cookies like vanilla wafers or even gluten-free alternatives if needed.
Final Thoughts
I hope you enjoy making these delightful Reese’s Peanut Butter No-Bake Bars as much as I do! They’re not only simple and quick but also irresistibly tasty—a perfect treat for any occasion. Whether you’re enjoying them with family or sharing with friends, these bars are sure to bring smiles all around. Happy baking (or should I say mixing!), and don’t forget to come back and share your experience!
Reese’s Peanut Butter No-Bake Bars
Indulge in the rich and creamy goodness of Reese’s Peanut Butter No-Bake Bars, a delightful treat that combines the beloved flavors of peanut butter and chocolate without the need for an oven. Perfect for busy weeknights or special gatherings, these bars are incredibly easy to prepare, requiring only 10 minutes of prep time. With a simple list of wholesome ingredients, you can create a decadent dessert that will impress family and friends alike. Whether you’re hosting a birthday party or enjoying a cozy movie night, these no-bake bars are sure to bring smiles all around.
- Prep Time: 10 minutes
- Cook Time: None
- Total Time: 0 hours
- Yield: Makes about 16 servings 1x
- Category: Dessert
- Method: No-bake
- Cuisine: American
Ingredients
- 1 cup creamy peanut butter
- 1 cup unsalted butter, melted
- 2 cups powdered sugar
- 2 cups graham cracker crumbs
- 1½ cups semisweet chocolate chips
- ½ cup creamy peanut butter (for topping)
Instructions
- In a large bowl, combine melted butter, creamy peanut butter, powdered sugar, and graham cracker crumbs. Mix until smooth.
- Press the mixture firmly into the bottom of a lined 9×13-inch baking dish.
- In a microwave-safe bowl, melt chocolate chips with half a cup of creamy peanut butter in 30-second intervals until smooth.
- Pour the melted mixture over the base and spread evenly.
- Refrigerate for at least 2 hours or until firm.
- Let sit at room temperature for 5 minutes before slicing into squares.
Nutrition
- Serving Size: 1 square (40g)
- Calories: 190
- Sugar: 12g
- Sodium: 90mg
- Fat: 14g
- Saturated Fat: 6g
- Unsaturated Fat: 8g
- Trans Fat: 0g
- Carbohydrates: 18g
- Fiber: 1g
- Protein: 3g
- Cholesterol: 15mg